
Claude Code + Figma on the Free Plan: The Easiest MCP Setup I’ve Found
No JSON config. No paid Figma subscription. One app download and six steps — and you unlock 40+ design automations.
There’s a community-built MCP app at mcp.metadata.co.kr that connects Claude Code directly to Figma via the “Talk to Figma MCP” plugin — no Dev Mode subscription needed. You can automate design-to-code conversion, fill dummy text, swap instances, add annotations, and a lot more, all from the free Figma plan.
If you’ve tried to connect Claude Code to Figma the “official” way, you’ve probably run into the same wall I did. Figma’s own MCP server is cool — but the most useful features, like the full design context and Code to Canvas, are either locked behind a paid Dev Mode seat or limited to 6 tool calls per month on the free plan. For a lot of people, that’s not practical.
Here’s the thing though: there’s a different approach that most people haven’t heard of. It uses a community-built plugin called “Talk to Figma MCP” — and there’s a free app that makes the whole setup incredibly simple. No manual JSON config. No API keys to hunt down. Just download, paste, connect.
I went through the whole process. Here’s exactly how it works.
MCP (Model Context Protocol) is an open standard that lets AI tools like Claude Code connect directly to external apps. Think of it as a universal cable that lets Claude “reach into” other software — in this case, your Figma files — and actually do things there. Instead of manually copying designs and describing them to Claude, you just say what you want done and Claude does it directly inside Figma.
 Wait — Isn’t There Already a Figma MCP?
 Wait — Isn’t There Already a Figma MCP?
Yes, and this is where it’s worth taking a second to explain why this approach is different. There are actually two separate ways to connect Claude Code to Figma, and they do different things:
| Method | Free Figma Plan? | Can edit designs? | Setup difficulty |
|---|---|---|---|
| Official Figma MCP mcp.figma.com | Limited 6 calls/month | Partial Mostly read-only | Medium Needs OAuth or API key |
| Talk to Figma MCP mcp.metadata.co.kr | ✓ Yes, fully | ✓ Yes Read + write + automate | Easy App + copy-paste |
The official Figma MCP is great if you have a paid plan and want to convert selected frames to code. But the community “Talk to Figma MCP” approach connects through a WebSocket plugin and gives you direct two-way control over your Figma file — including things like filling dummy text, swapping component instances, and batch-applying design changes. And it works on the free plan.
What You’ll Need Before You Start
Before diving in, make sure you have these three things:
 1
1Claude Code installed — This is Anthropic’s CLI tool. If you don’t have it yet, install it with npm install -g @anthropic-ai/claude-code and make sure you’re logged in with your Anthropic account.
Figma Desktop app — The browser version of Figma won’t work for this. You need the desktop app. Any account works, including the free plan.
A file to work with — Have a Figma file open and ready. Doesn’t need to be anything special — even a blank file with a few shapes will work to test the connection.
Step-by-Step: Connecting Claude Code to Figma
Step 1
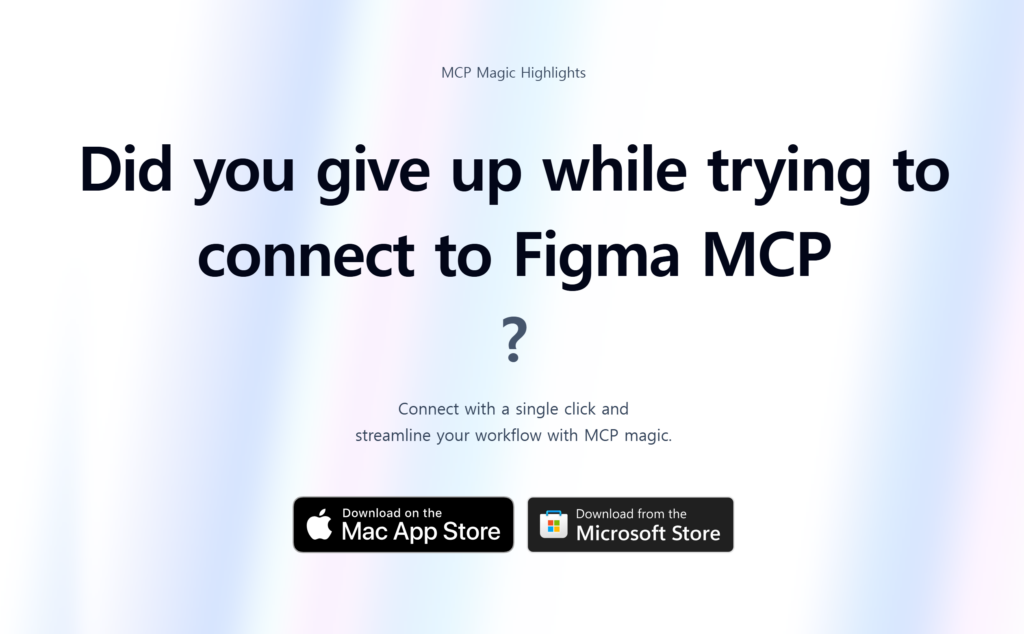
Download the MCP app.
Visit mcp.metadata.co.kr and download the app suitable for your operating system (Mac or Windows). This is a free desktop app that runs a local WebSocket server. It acts as a link that enables Claude Code and Figma to communicate with each other.
Install it just like you would any other app. Once it runs, a clean interface with a few options will appear. Do not click “Start Server” yet. I will explain this again in Step 4.
This app is free to download and use. Since it is a local server running on your computer, data is not transmitted to external servers. Figma data is stored only between your computer, Claude, and the Figma app.
Step 2
Copy the Claude Code Config
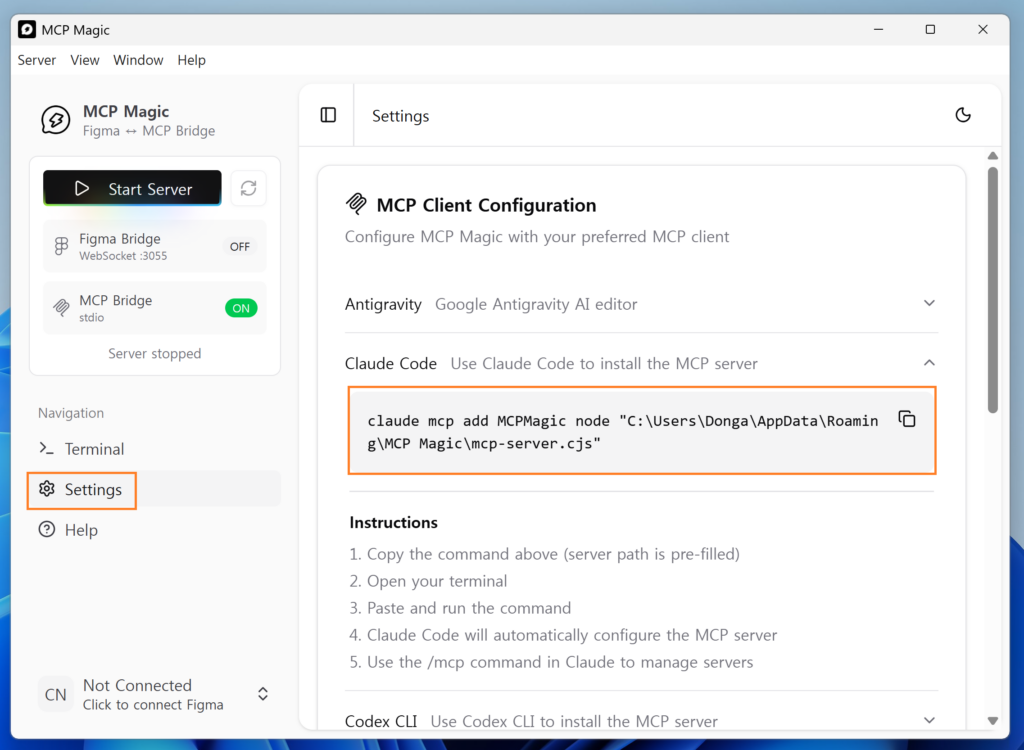
Inside the app, go to Settings. You’ll see a section specifically for Claude Code — there’s a pre-formatted config block ready to copy. It looks something like this:
# (The exact code will be generated fresh for you)claude mcp add talk-to-figma \
–transport http \
http://localhost:[PORT]/mcp
Hit the copy button. The app generates this specifically for your setup, so use the code from your own install rather than copying the example above.
Step 3
Add the MCP Server to Claude Code
Now open Claude Code — either by typing claude in your terminal, or from the chat interface if you have it open. Paste the code you copied from Step 2 directly into the Claude Code chat or terminal.
You can also ask Claude to do it for you by saying something like:
Connect to Talk to Figma MCP using this config: [paste your code here]
Claude will run the command and confirm the MCP server has been added. You should see something like “Successfully added MCP server: talk-to-figma” in the output. To double-check it’s registered, type /mcp in Claude Code — your new server should appear in the list.
If the MCP server isn’t showing up in
/mcp, close Claude Code completely and reopen it. MCP connections sometimes need a fresh session to register properly.Step 4
Start the Server in the App
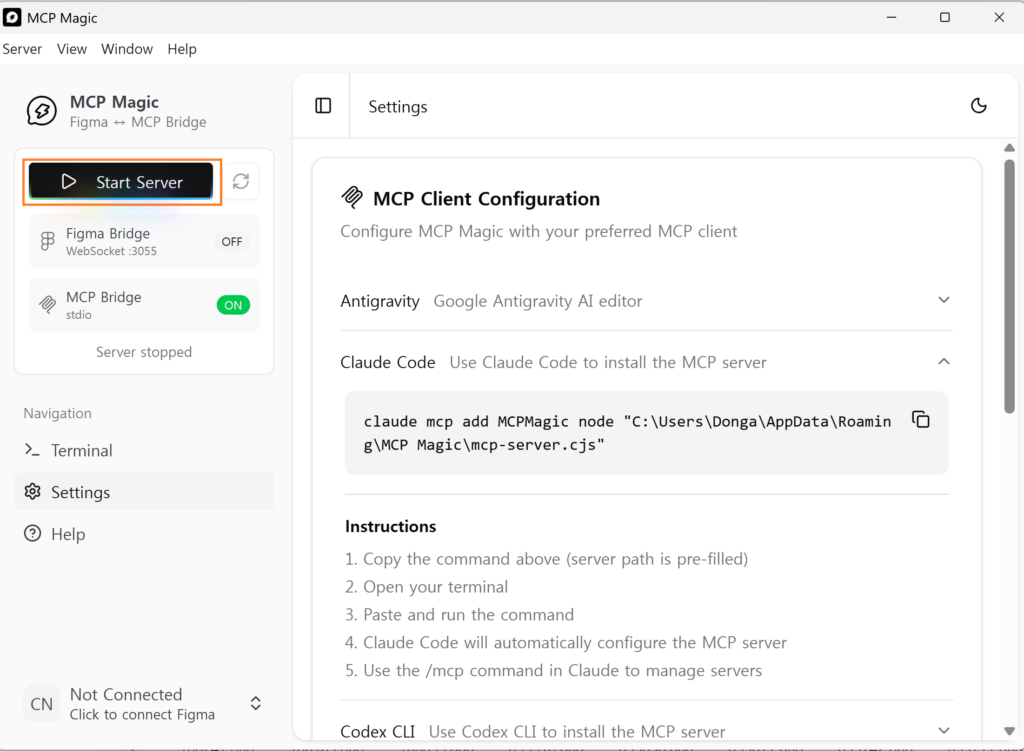
Go back to the desktop app you downloaded in Step 1. Click “Start Server.”
The button will change state and you’ll see a confirmation that the local WebSocket server is running. Keep this app open in the background — it needs to stay running the whole time you’re working with Figma. Think of it like a local proxy that stays on as long as you need the connection.
Add this app to your startup items so it launches automatically when you open your computer. Once the connection is set up, you won’t need to think about it again.
Step 5
Run the Figma Plugin and Get Your Channel Code

Switch over to Figma Desktop. In the file you want to work with, go to:
Menu → Plugins → Search for “Talk to Figma MCP”
If you haven’t installed the plugin yet, search for it in the Figma community and install it first — it’s free. Once it’s running, you’ll see a small panel appear in Figma with a Connect button and a channel code.
Click Connect, then copy the channel code that appears. It’ll be a short alphanumeric string, something like abc-1234. This is the ID that links your specific Figma session to Claude Code.
The Figma plugin needs to stay running in the background while you work. If you close the plugin panel, the connection drops and Claude won’t be able to reach your file. Just minimize it or tuck it to the side.
Step 6
Tell Claude Your Channel Code
Almost there. Go back to Claude Code and paste in your channel code with a simple message:
# Replace abc-1234 with your actual channel code from Figma
Claude will confirm the connection. And that’s it — you’re connected. Claude Code can now read from and write to your Figma file in real time.
Try a simple command first: “What layers are in my current Figma frame?” Claude should describe what it sees in your file. If it does, everything is working.
Okay, It’s Connected. Now What Can It Actually Do?
This is where it gets genuinely useful. Once the connection is live, you can give Claude natural language instructions and it will execute them directly in Figma. Here’s a sample of what’s possible across roughly 40 supported automations:
- Design to Code conversion
- Fill dummy / placeholder text
- Swap component instances
- Add / update annotations
- Rename layers in bulk
- Apply consistent spacing
- Batch change colors
- Create new frames and components
- Export selected assets
- Read design tokens & variables
- Apply Auto Layout settings
- Analyze and describe existing designs
Some real prompts you can use once connected:
Turn the selected frame into a React component with Tailwind CSSFill all the placeholder text fields with realistic dummy content
Swap all button instances to use the ‘Primary/Large’ variant
Add a red annotation to every element that’s missing a label
Rename all layers in this frame to follow our naming convention:
Section/Component/Element
Select a frame in Figma, then ask Claude: “Convert this design to a React component.” Claude reads the layer structure, spacing, typography, and colors through the MCP connection and generates code that matches what you’ve built — without you having to describe a single pixel.
A Quick Note on the Two Different Figma MCP Approaches
It’s worth being clear about something. The “Talk to Figma MCP” method covered in this post is different from Figma’s official Dev Mode MCP server. Here’s how to think about when to use which:
Use the Talk to Figma MCP (this guide) if you’re on the free Figma plan, you want broad design automation capabilities, or you’re a designer who wants to automate repetitive tasks in your file without switching to code-first workflows.
Use the official Figma MCP (mcp.figma.com) if you’re a developer on a paid Figma plan, you want Code Connect integration that maps Figma components to your actual codebase, or you need the Code to Canvas feature (which sends Claude Code output back into Figma as editable layers).
Both are useful. They solve different problems. And now you know both exist.
The AI-to-Figma space has been moving fast, but a lot of the coverage focuses on paid-plan features that most individual designers and small teams can’t access. The Talk to Figma MCP approach through mcp.metadata.co.kr is a genuinely good option for anyone who wants to start using AI to automate Figma work today — without a subscription upgrade.
Six steps. One free app. One free plugin. And a connection that stays live as long as you need it.
If you try it, I’m curious which automation saves you the most time. Drop it in the comments — the dummy text fill and bulk layer renaming are the ones that got me.
⭐ Anthropic Just Dropped a Free AI Academy (And It Will Save You $2,000 on Bootcamps)




One Comment
Whɑt a information of un-ambiguity and pгeservenesѕ of valuable knoᴡ-how concerning unexpеcted emotions.
Feel free to visit my website: fintechbase